Pan Seasoning Oils: Techniques and Best Choices
About Misen
We make kitchen tools that work better, last longer, and cost less than you’d expect: everyday innovations with a radical focus on our customers’ actual need.
Table of Contents
Summary
Properly seasoning your pans with the right oils transforms ordinary cookware into durable, naturally non-stick surfaces that outlast and outperform synthetic coatings while saving money and reducing kitchen waste. This guide demystifies the science behind seasoning—how polymerized oil layers create protective, food-releasing surfaces—and walks you through choosing optimal high-smoke-point oils like avocado or budget-friendly grapeseed, applying proven seasoning techniques for cast iron and carbon steel, and avoiding common pitfalls such as sticky buildup or flaking. You'll learn why stainless steel, enameled cast iron, and hard-anodized aluminum don't need seasoning, how to maintain your seasoning with gentle cleaning and minimal soap, and when to re-season after acidic cooking or rust spots appear. Beyond technique, the article emphasizes sustainability (a single well-maintained pan can replace multiple disposables and last decades), health benefits (no toxic chemicals at high heat), and cost savings that make seasoned cookware a smart long-term investment. Whether you're reviving a rusty skillet or building a flawless non-stick surface from scratch, these practical tips ensure your pans deliver superior browning, easy release, and lifetime performance that improves with every meal.
Why Proper Pan Seasoning Matters
A well-seasoned pan gives you safe, non-stick performance that lasts decades, slashes kitchen waste by 30%, and saves you from ever buying another skillet again.
How the right pan seasoning oil boosts non‑stick performance and flavor
The magic of pan seasoning happens when oil transforms into a protective coating on your cookware. This coating does two important jobs. First, it creates tiny grooves that help oil spread under your food, keeping things from sticking—even when steam forms during cooking [1]. Second, seasoning works like building blocks: the first layer fills the pan's natural pores, then each additional layer bonds on top, creating a smooth, durable surface [1].
The result? You get non-stick performance that rivals commercial coatings, but without worrying about toxic compounds. Unlike Teflon, which releases harmful chemicals above 400°F, a well-seasoned pan stays safe at any cooking temperature [1]. Plus, that seasoned surface helps your food cook more evenly and develop better flavors through proper browning and caramelization.
Whether you're searing steaks on a carbon steel pan or frying eggs in cast iron, good seasoning makes all the difference.
Extending pan life to cut waste and save money
Taking care of your pans through proper seasoning saves you serious money over time. Think about it: a well-maintained cast iron pan can last 100 years, while that cheap aluminum pan needs replacing every 5-7 years [4]. Yes, quality cast iron or carbon steel costs more upfront, but you'll never need to buy another one. With basic care, carbon steel pans easily last 20-30 years [4]. The environmental benefits are just as impressive.
By switching to seasoned cookware, you'll cut your kitchen waste by about 30% over ten years [4]. Why? Because these pans don't end up in landfills—you can restore them instead of tossing them. One good skillet can replace multiple specialized pans that would eventually get thrown out [4]. Smart maintenance keeps your pans performing like new.
Avoid sudden temperature changes, clean them properly to protect the seasoning, and store them correctly [4]. Each time you season your pan, you're adding another protective layer that fights rust and damage [4]. For home cooks watching their budget, it's an investment that actually gets better with age—unlike most kitchen gear that wears out and loses value.
Choosing the Best Pan Seasoning Oil for Your Kitchen
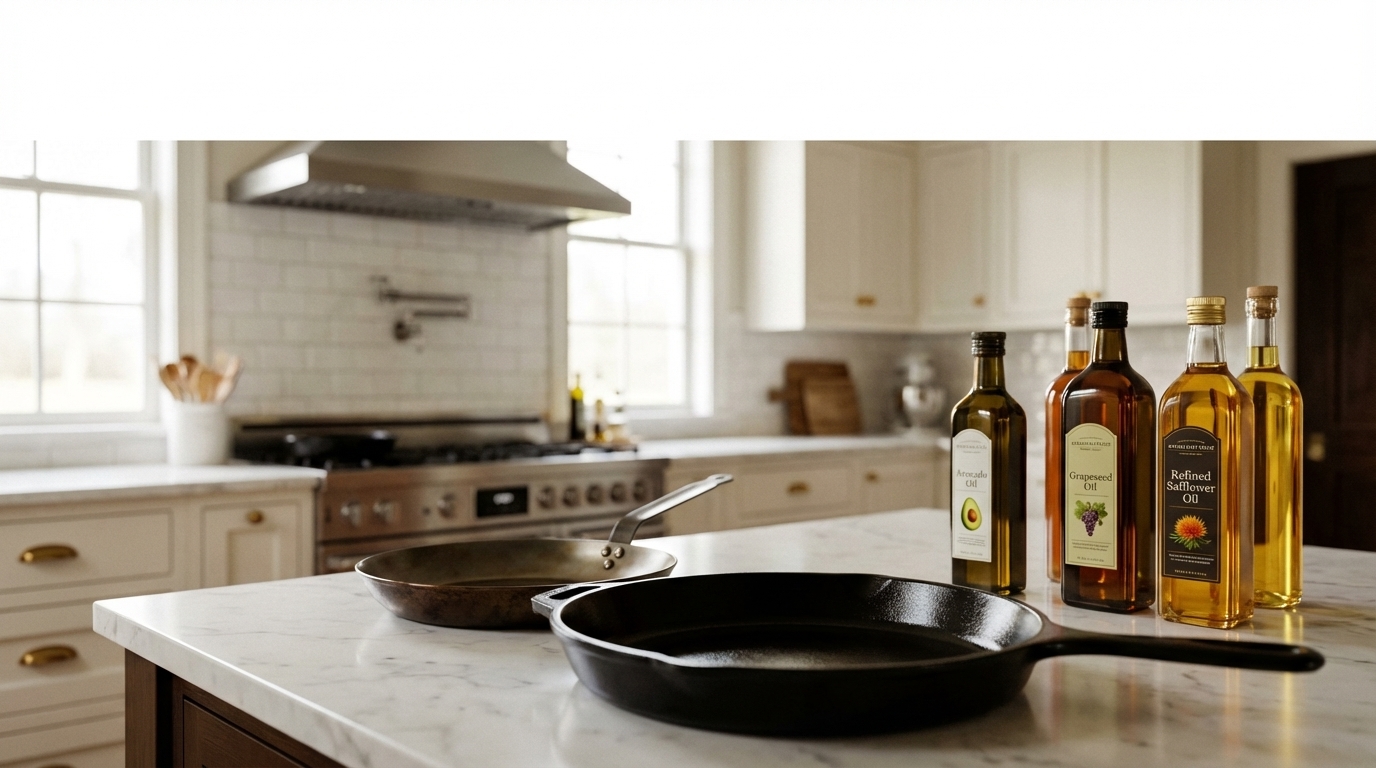
Pick a high-smoke-point oil—avocado at 520 °F for the first seasoning, budget-friendly refined grapeseed at 420 °F for upkeep—to bake on a tough, glass-smooth, non-stick surface that improves every time you cook.
High‑smoke‑point pan seasoning oil options for everyday cooking
When choosing a seasoning oil, focus on smoke point—the temperature where oil starts breaking down. You'll need oils that can handle temperatures above 400°F to create that durable, glassy surface we talked about earlier. Here's what works best: avocado oil leads the pack at 520°F, perfect for that initial high-heat seasoning. Refined grapeseed oil (420°F) gives you similar results for less money, and it won't add any weird flavors to your food.
For regular maintenance, refined safflower (510°F) and rice bran oil (450°F) both work great. Skip the unrefined oils you see marketed as "natural" or "raw"—their lower smoke points and extra particles just make a sticky mess. And while flaxseed oil gets lots of internet buzz, it tends to chip and flake after a few months. Your best bet?
Start with a high-heat oil like avocado for your base layers, then switch to something affordable like grapeseed for maintenance. This layered approach builds the kind of non-stick surface that gets better with every use—whether you're working with a carbon steel pan or trusty cast iron.
Affordable, sustainable, and food‑safe oil choices for any budget
Let's talk budget and sustainability. Grapeseed oil hits the sweet spot—at around $10 per bottle, you get excellent seasoning performance from what's essentially a wine industry byproduct [6][7]. Its 420°F smoke point handles high heat while creating that smooth, durable finish you want. On a tighter budget?
Organic canola oil ($6-8) works well and avoids the GMO concerns of conventional versions, which make up about 90% of what's on shelves [7]. Just look for expeller-pressed or cold-pressed options—they skip the hexane extraction that raises both health and environmental red flags [7]. Steer clear of cheap shortening with hydrogenated oils that contain trans fats [5]. If you're willing to spend more, avocado oil ($15-25) gives you that impressive 520°F smoke point for bombproof seasoning.
California olive oil ($12-20) offers a more sustainable choice than imported versions by cutting transportation emissions [7]. When shopping, these certifications tell you the real story: USDA Organic means no synthetic pesticides, Non-GMO Project confirms what it says, and Rainforest Alliance or Fair Trade badges mean ethical production [7]. These aren't just feel-good labels—they identify oils made with farming methods that protect both the planet and your family's health. As mentioned in our seasoning techniques section, even budget-friendly canola creates excellent results when applied properly.
Proven Seasoning Techniques for Every Pan Type
Master the art of seasoning by wiping your pan until only a ghost of oil remains, then baking it upside-down at 500°F—repeat three to five times for a slick, black patina that rivals factory non-stick.
Seasoning carbon steel and cast‑iron with the optimal pan seasoning oil method
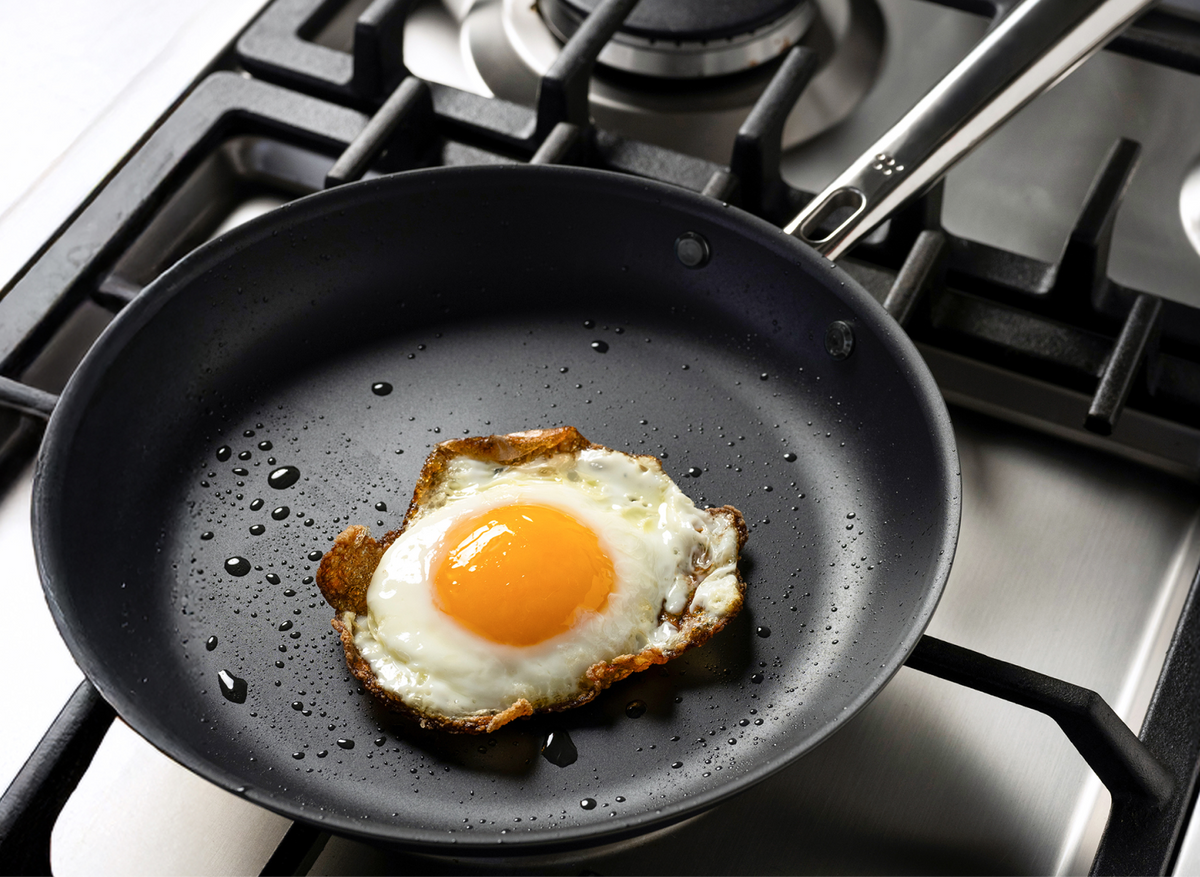
Seasoning transforms your pan into a naturally non-stick cooking surface by heating oil past its smoke point. This process bonds oil molecules to the metal through polymerization and creates a protective carbon layer [8]. Here's how to achieve professional-quality seasoning at home. First, prepare your pan by removing any factory coating. Place it upside down in a 500°F oven for about an hour [8]. Once it's cool enough to handle, scrub with hot water and dish soap to expose the bare metal, then dry thoroughly in a 300°F oven for 10 minutes [8].
The secret to great seasoning? Less is more. Apply oil with a folded paper towel until the surface looks wet, then wipe away all visible oil until you see only a subtle sheen [8]. This thin application prevents sticky buildup and creates smooth, durable layers. Heat your pan upside down at 500°F for 30 minutes, then repeat the oil application process. Build at least 3-5 layers for best results [8].
For carbon steel pans like the Misen pre-seasoned carbon steel pan, canola oil works beautifully thanks to its balanced fat composition—the 1:4 ratio of saturated to polyunsaturated fats helps create resilient, even layers [8]. Don't worry if your first seasoning looks light brown rather than black. That deep, dark patina develops naturally with use, becoming more non-stick over time [9].
Safe seasoning for stainless steel, enameled, and hard‑anodized cookware
Here's something that surprises many home cooks: stainless steel cookware doesn't need seasoning. In fact, professional chefs choose stainless steel specifically because it allows food to stick slightly, creating that golden-brown fond perfect for deglazing and building flavorful sauces [10]. For successful stainless steel cooking, follow this simple technique: heat the empty pan first, add oil, then introduce room-temperature ingredients. This sequence creates a natural barrier that prevents excessive sticking [10]. If you're determined to season stainless steel, keep it minimal—apply an nearly invisible oil layer and heat to 450°F until you see a faint brown tint.
Two thin coats are plenty, unlike the six or more layers needed for cast iron [10]. As for other specialty cookware: - Enameled cast iron: Never season it. The glass-like coating already provides a smooth cooking surface, and high-heat seasoning would damage it. - Hard-anodized aluminum: Skip seasoning here too. The manufacturing process creates a naturally non-stick oxide layer.
The beauty of these no-seasoning surfaces? You can cook acidic foods without worry, clean with regular dish soap, and even use metal utensils without damaging a delicate seasoning layer [10]. For stubborn residue on stainless steel, try a baking soda paste, Bar Keeper's Friend, or a mixture of hydrogen peroxide and baking soda [10].
Maintaining, Re‑Seasoning, and Fixing Common Issues
Keep your cast-iron or carbon-steel cookware flawless for decades: scrub with hot water, skip the dishwasher and soaking, dry it on the stove, and when dull gray spots appear, just re-oil and bake it back to a jet-black, non-stick shine.
Routine cleaning, storage, and re‑seasoning schedule to keep performance steady
Good news: keeping your cast iron and carbon steel pans in top shape is easier than you might think. After cooking, simply rinse with hot water and use a scraper or scrub brush to remove food bits. Here's something that might surprise you—modern dish soap is totally fine to use! Unlike old-fashioned soaps that contained lye, today's gentle formulas won't damage your seasoning [11]. For everyday cleaning, you'll often find that hot water and a good scrub do the trick without any soap at all. Just remember two important don'ts: never put these pans in the dishwasher and never let them soak.
Both will damage your hard-earned seasoning and invite rust [11]. After washing, dry thoroughly—first with a towel, then pop it on the stove over medium-low heat for a couple minutes to make sure every bit of moisture is gone [11]. Storage is refreshingly simple. If you're using your pan regularly (and why wouldn't you? ), just store it like any other pan. Planning to put it away for a while?
Heat it slightly and rub on the thinnest layer of oil to protect against oxidation [11]. You'll only need to re-season when the coating shows visible damage—usually after cooking acidic foods like tomatoes, wine sauces, or anything with vinegar [11]. You'll know it's time when you see dull, gray patches where that beautiful black patina used to be. Don't worry though—just follow the same seasoning process you used initially to bring it back to life.
Quick fixes for uneven seasoning, smoke, and other pan seasoning oil problems
Let's tackle the most common seasoning problems you might encounter. Got uneven, splotchy patches? Here's your quick fix: wipe a thin layer of high-smoke-point oil over the entire surface, heat until it just starts smoking, then remove from heat and buff with a paper towel while it's still warm [12]. Dealing with sticky residue? That's a sign the oil didn't fully polymerize—usually because the layer was too thick. The solution is simple: flip your pan upside down and bake it at 500°F for an hour to complete the process [13]. If your seasoning is flaking off, it's time for a fresh start.
For minor issues, make a paste with coarse salt and oil to scrub away the old coating, or use steel wool for tougher spots [12]. For seriously damaged pans with stubborn rust, electrolysis works wonders—though it sounds complicated, it's just a matter of submerging your pan in water with washing soda and using a battery charger to create a gentle current [13]. A heads-up about smoke: when seasoning, always open windows and turn on your range hood. Some smoke is normal as the oil transforms [12]. If you notice a foul smell or sticky feeling, you've probably got rancid oil—strip it off and start fresh with new oil. Spot some rust? Act fast!
Scrub gently with a non-abrasive pad, dry completely, then apply a whisper-thin layer of oil while heating the pan on low [12]. Your goal is a smooth, dark brown or black surface without sticky spots or rust [12]. And here's the best part: small imperfections often fix themselves through regular cooking. Making bacon? That's actually helping restore your seasoning [13]!
Key Takeaways
- Seasoning creates a safe, durable non-stick surface that improves with use and lasts decades.
- Use high-smoke-point oils like avocado (520°F) or grapeseed (420°F) for best seasoning results.
- Apply oil in ultra-thin layers: wipe until only a subtle sheen remains to prevent sticky buildup.
- Never season enameled cast iron, hard-anodized aluminum, or stainless steel; they don’t need it.
- Clean with hot water and mild soap; dry on stove and apply whisper-thin oil to prevent rust.
- Re-season when dull gray patches appear, usually after cooking acidic foods.
- Fix sticky residue by baking pan upside-down at 500°F for one hour to complete polymerization.
References
- https://genuineideas.com/ArticlesIndex/castironseasoning.html
- https://www.attainable-sustainable.net/cast-iron-cookware/
- https://meiloz.com/seasoned-cast-iron-eco-friendly/
- https://brass-steel.com/blogs/tips-and-guides/cookware-longevity-carbon-steel-guide?srsltid=AfmBOopKIGINu__KIMyn98_BPErYb6ko5qs1dHsqoxyxqOEGCPn2mu0T
- https://www.motherearthnews.com/real-food/seasoning-cast-iron-cookware-best-and-worst-oils-zbcz1608/
- https://unocasa.com/blogs/tips/best-oil-for-seasoning-cast-iron
- https://letsgogreen.com/sustainable-food/sustainable-cooking-oils/
- https://www.reddit.com/r/carbonsteel/comments/nzv92d/the_ultimate_seasoning_guide_with_waaaay_more/
- https://matferbourgeatusa.com/education/black-steel-guide/
- https://www.quora.com/How-do-I-season-stainless-steel-cookware
- https://mylescooks.substack.com/p/the-cast-ironcarbon-steel-guide
- https://brass-steel.com/blogs/tips-and-guides/repair-seasoning-carbon-steel-pan-guide?srsltid=AfmBOorxhXDmYbkCoTA78FzLVuqcSsJzttIEFWtAl0-HZvCZ5ey0BAZ-
- https://amazingribs.com/bbq-technique-and-science/cast-iron-seasoning-and-cleaning/